Customizing Your Watchface
In the previous page of the tutorial, you learned how to create a new Pebble
project, set it up as a basic watchface and use TickTimerService to display
the current time. However, the design was pretty basic, so let's improve it with
some customization!
In order to do this we will be using some new Pebble SDK concepts, including:
- Resource management
- Custom fonts (using
GFont) - Images (using
GBitmapandBitmapLayer)
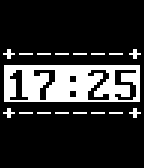
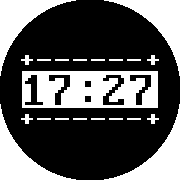
These will allow us to completely change the look and feel of the watchface. We will provide some sample materials to use, but once you understand the process be sure to replace these with your own to truly make it your own! Once we're done, you should end up with a watchface looking like this:
aplite
basalt
chalk

First Steps
To continue from the last part, you can either modify your existing Pebble
project or create a new one, using the code from the end of the last tutorial
as a starting point. Don't forget to also include changes to package.json.
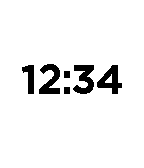
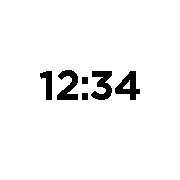
The result of the first part should look something like this - a basic time display:
aplite
basalt
chalk

Let's improve it!
Adding a Custom Font
App resources (fonts and images etc.) are managed in the package.json
file in the project's root directory, as detailed in
App Resources. Below is an example entry in the
resources section:
"resources": {
  "media": [
    {
      "type": "font",
      "name": "FONT_PERFECT_DOS_48",
      "file": "fonts/perfect-dos-vga.ttf",
      "compatibility":"2.7"
    }
  ]
}
All image files and fonts must reside in subfolders of the /resources folder
of your project. In the example above, we would place our perfect-dos-vga.ttf
file in the /resources/fonts/ folder of our project. So, create this if it
doesn't already exist.
A custom font file must be a
TrueType font in the .ttf file format.
Here is an example font to use
(source).
Now we will substitute the system font used before (FONT_KEY_BITHAM_42_BOLD)
for our newly imported one.
To do this, we will declare a GFont globally near the top of the source
file.
// Declare globally
static GFont s_time_font;
Next, we add the creation and substitution of the new GFont in the existing
call to text_layer_set_font() in main_window_load(). Shown here is an
example identifier used when uploading the font earlier, FONT_PERFECT_DOS_48,
which is always pre-fixed with RESOURCE_ID_:
void main_window_load() {
  // ...
  // Create GFont
  s_time_font = fonts_load_custom_font(resource_get_handle(RESOURCE_ID_FONT_PERFECT_DOS_48));

  // Apply custom font to TextLayer
  text_layer_set_font(s_time_layer, s_time_font);
  // ...
}
And finally, safe destruction of the GFont in main_window_unload():
void main_window_unload() {
  // ...
  // Unload GFont
  fonts_unload_custom_font(s_time_font);
  // ...
}
After re-compiling and re-installing with pebble build && pebble install,
the watchface should feature a much more interesting font.
An example screenshot is shown below:
aplite
basalt
chalk

Adding a Bitmap
The Pebble SDK also allows you to use images in your project and handles the
process of preparing them for the watch. In this tutorial we will use a 2-color
(black and white) bitmap image as an example. You can ensure that you meet this
requirement by checking the export settings in your graphics package, or by
purely using only white (#FFFFFF) and black (#000000) in the image's
creation. Another alternative is to use a dithering tool such as
HyperDither.
This will be loaded from the watchface's resources into a GBitmap data
structure before being displayed using a BitmapLayer element. These two
behave in a similar fashion to GFont and TextLayer, so let's get
started.
You add a bitmap to the package.json file in the
same way as a font, except the new media array
object will have a type of bitmap. Below is an example:
{
  "type": "bitmap",
  "name": "IMAGE_BACKGROUND",
  "file": "images/background.png"
}
As before, here is an example bitmap we have created for you to use, which looks
as shown below. Be sure to save it to a resources/images directory.

Once this has been added to the project, return to your .c file and declare
two more pointers, one each of GBitmap and BitmapLayer near the top of
the file:
static BitmapLayer *s_background_layer;
static GBitmap *s_background_bitmap;
Now we will create both of these in main_window_load(). After both elements
are created, we set the BitmapLayer to use our GBitmap and then add it
as a child of the main Window as we did for the TextLayer.
However, is should be noted that the BitmapLayer must be added to the
Window before the TextLayer. This will ensure that the text is drawn on
top of the image. Otherwise, the text will be drawn behind the image and remain
invisible to us. Here is that process in full, to be as clear as possible:
// Create GBitmap
s_background_bitmap = gbitmap_create_with_resource(RESOURCE_ID_IMAGE_BACKGROUND);

// Create BitmapLayer to display the GBitmap
s_background_layer = bitmap_layer_create(bounds);

// Set the bitmap onto the layer and add to the window
bitmap_layer_set_bitmap(s_background_layer, s_background_bitmap);
layer_add_child(window_layer, bitmap_layer_get_layer(s_background_layer));
As always, the final step should be to ensure we free up the memory consumed by
these new elements in main_window_unload():
// Destroy BitmapLayer
bitmap_layer_destroy(s_background_layer);

// Destroy GBitmap
gbitmap_destroy(s_background_bitmap);
The final step is to set the background color of the main Window to match
the background image. Do this in init() after window_create():
// Change the background color
window_set_background_color(s_main_window, GColorBlack);
With all this in place, the example background image should nicely frame the time and match the style of the new custom font. Of course, if you have used your own font and bitmap (highly recommended!) then your watchface will not look exactly like this.
aplite
basalt
chalk
Conclusion
After adding a custom font and a background image, our new watchface now looks
much nicer. If you want to go a bit further, try adding a new TextLayer in
the same way as the time display one to show the current date (hint: look at the
formatting options
available for strftime()!)
As with last time, you can compare your own code to the example source code provided below.
View source code
#include <pebble.h>

static Window *s_main_window;
static TextLayer *s_time_layer;
static BitmapLayer *s_background_layer;

static GFont s_time_font;
static GBitmap *s_background_bitmap;

static void update_time() {
  // Get a tm structure
  time_t temp = time(NULL);
  struct tm *tick_time = localtime(&temp);

  // Write the current hours and minutes into a buffer
  static char s_buffer[8];
  strftime(s_buffer, sizeof(s_buffer), clock_is_24h_style() ?
                                          "%H:%M" : "%I:%M", tick_time);

  // Display this time on the TextLayer
  text_layer_set_text(s_time_layer, s_buffer);
}

static void main_window_load(Window *window) {
  // Get information about the Window
  Layer *window_layer = window_get_root_layer(window);
  GRect bounds = layer_get_bounds(window_layer);

  // Create GBitmap
  s_background_bitmap = gbitmap_create_with_resource(RESOURCE_ID_IMAGE_BACKGROUND);

  // Create BitmapLayer to display the GBitmap
  s_background_layer = bitmap_layer_create(bounds);

  // Set the bitmap onto the layer and add to the window
  bitmap_layer_set_bitmap(s_background_layer, s_background_bitmap);
  layer_add_child(window_layer, bitmap_layer_get_layer(s_background_layer));

  // Create GFont
  s_time_font = fonts_load_custom_font(resource_get_handle(RESOURCE_ID_FONT_PERFECT_DOS_48));

  // Create the TextLayer with specific bounds
  s_time_layer = text_layer_create(
      GRect(0, PBL_IF_ROUND_ELSE(58, 52), bounds.size.w, 50));

  // Improve the layout to be more like a watchface
  text_layer_set_background_color(s_time_layer, GColorClear);
  text_layer_set_text_color(s_time_layer, GColorBlack);
  text_layer_set_text(s_time_layer, "00:00");
  text_layer_set_font(s_time_layer, fonts_get_system_font(FONT_KEY_BITHAM_42_BOLD));
  text_layer_set_text_alignment(s_time_layer, GTextAlignmentCenter);

  // Apply custom font to TextLayer
  text_layer_set_font(s_time_layer, s_time_font);

  // Add it as a child layer to the Window's root layer
  layer_add_child(window_layer, text_layer_get_layer(s_time_layer));
}

static void main_window_unload(Window *window) {
  // Destroy TextLayer
  text_layer_destroy(s_time_layer);

  // Unload GFont
  fonts_unload_custom_font(s_time_font);

  // Destroy BitmapLayer
  bitmap_layer_destroy(s_background_layer);

  // Destroy GBitmap
  gbitmap_destroy(s_background_bitmap);
}

static void tick_handler(struct tm *tick_time, TimeUnits units_changed) {
  update_time();
}

static void init() {
  // Create main Window element and assign to pointer
  s_main_window = window_create();

  // Change the background color
  window_set_background_color(s_main_window, GColorBlack);

  // Set handlers to manage the elements inside the Window
  window_set_window_handlers(s_main_window, (WindowHandlers) {
    .load = main_window_load,
    .unload = main_window_unload
  });

  // Show the Window on the watch, with animated=true
  window_stack_push(s_main_window, true);

  // Register with TickTimerService
  tick_timer_service_subscribe(MINUTE_UNIT, tick_handler);

  // Make sure the time is displayed from the start
  update_time();
}

static void deinit() {
  // Destroy Window
  window_destroy(s_main_window);
}

int main(void) {
  init();
  app_event_loop();
  deinit();
}
What's Next?
The next section of the tutorial will introduce PebbleKit JS for adding web-based content to your watchface.