CloudPebble Graphical UI Editor
Today we're adding a new feature to [CloudPebble] that will make it easier than ever to build your watchfaces and watchapps! The new UI Editor will let you graphically build the user interface for your C app; you can then use the generated C to build anything you like.

The UIs you build here can be exported from and imported to CloudPebble, and can be used both in CloudPebble and with the native SDK.
Getting Started
The easiest way to get started with the UI Editor is to create a new, empty C project in [CloudPebble].
To create your first window, click "Add New" next to "Source Files", select "Window Layout", and name your new window:
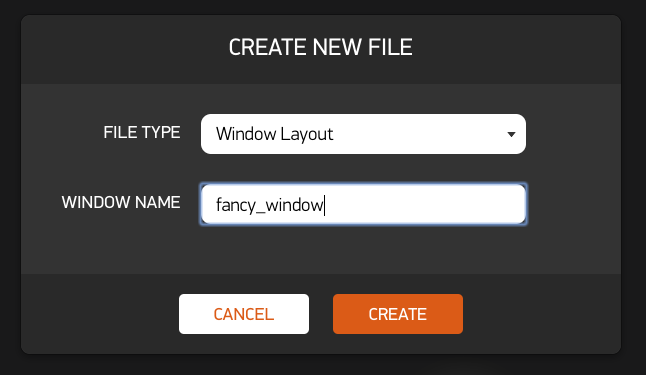
This will create two new files, your_window.c and your_window.h. You will
build your user interface in your_window.c.
Click on the "Toolkit", then select some layers (e.g.
TextLayers) to add. You can drag these UI elements around on
the canvas and set proprties such as the text font or colour from the Properties
tab to the right. We recommend changing the auto-generated "Layer ID" fields to
something more obvious, as this is what the variables in the generated code will
be called.
When your UI is ready you can add functionality by clicking the pencil and ruler
on the far right of the window and adding code in and around the
show_your_window and hide_your_window functions. Note that you should not
change the code between the comments; nor should you change the comments
themselves.
When you want to display your window you will have to set up something to show
it — this is what the show_your_window function is for. Create a new C file
called main.c and fill it with something like this:
#include <pebble.h>
#include "your_window.h"

int main() {
  show_your_window();
  app_event_loop();
  return 0;
}
Of course, you should always replace your_window in these examples with
whatever you called your window.
Make sure you have saved everything, then go ahead and build your project!
Going Further
Beyond simply displaying text, you can also upload fonts or black and white images and use those, too. Just add them as resources as you usually would; they will become available in the appropriate dropdowns for TextLayers, BitmapLayers and ActionBarLayers).
You can create multiple windows and register click handlers on those windows to
move between them; take a look at
our user interface guide
for details on how to do that. You can show new windows by
including the some_window.h file and calling the relevant show_some_window
function. Note, however, that single window cannot be reused again in the
window stack.
If you want to add layers to your window that the UI editor does not support,
you can still use the editor for the rest of the UI; then add code to create the
extra elements in the show_your_window function.
And remember: this is just the first iteration! We plan to regularly enhance the UI editor to expand its capabilities. We would appreciate your feedback! If you have any comments, send them to cloudpebble@getpebble.com or post them on our forum.
If you want to go further still, come visit us! We recently announced our second annual Developer Retreat and applications to attend are now open.
[CloudPebble]:
Overview
Categories
- All Posts
- #makeawesomehappen
- At the Pub
- Beautiful Code
- CloudPebble
- Down the Rabbit Hole
- Freshly Baked
- Timeline